Friday, May 5, 2023

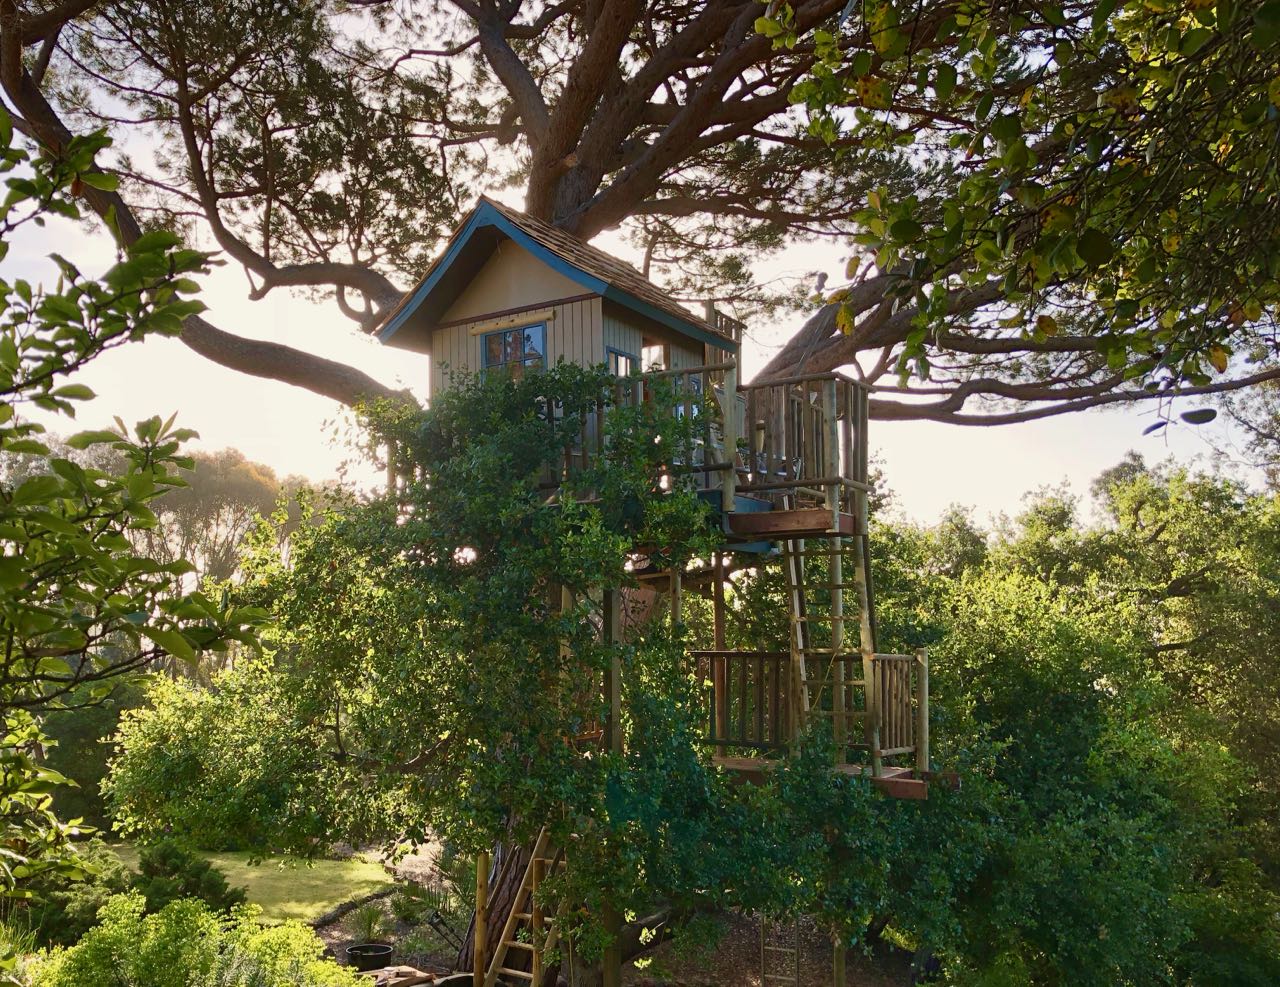
My Tree House Project


Thank you for visiting my site.  I have chronicled the history of my adventure building my Tree House.

If you want to read about it from inception to completion you may want to start with the oldest post first and work your way forward.  This link is to the first post.


Once you are on that post you may click on the calendar of posts on the right-hand side and continue with the next oldest post, etc.

I hope you enjoy reading what I have done.  If you have any questions or just want to communicate with me you can reach me at highbridgeparkdevelopment@gmail.com

Re Cabling the Tree House

 Since I built the Tree House some years ago, it has remained relatively stable.  I did adjust the height of one support by about an inch a year or so ago just to make the house level again.  I think that one of the branches upon which the Tree House rests has actually lowered by an inch or so. That was a relatively minor adjustment that was accomplished with a jack and a shim under the support pole.

Now, this last winter we had some pretty severe storms out here and I believe we had one storm where the winds were up to about 82 MPH. That's Level I hurricane winds. Consequently, the cable that I had strung from the large Pine tree to the Tree House, which is suspended from the Oak tree, was pulled out of its mooring in the Pine tree.  This resulted in a minor amount of sway in the Tree House.  I had put in that cable to eliminate the sway. It wasn't too bad without it. It was more like being on a boat and pitching and yawing in the swell.

Anyway, I went out to the hardware store and got a much larger anchor for the Pine tree.  Originally I had installed an eyebolt.  The problem with an eyebolt is that at the base of the eye portion, there is a seam, and, as it so happened with that much force on it, the eye opened and the cable was released.  I replaced the eyebolt with a larger bolt with a metal tab with two holes in it.  One hole is what I put the new bolt into, and the other hole is where I passed the cable through.  It took a few hours to get it reinstalled.  The biggest problem was getting the 10" bolt into the tree. I drilled a tap hole. I didn't want to make the tap hole too large, and when I went to screw in the bolt, the force needed to screw it all the way in was tremendous.  I had to get out a very large and special-purpose drill to make it go in all the way (30 feet in the air on a ladder).

Since I have installed the new bolt, there has been no noticeable sway in the Tree House.  

Job done.

Saturday, January 22, 2022

The New Firepole and Stairway

 I finally got around to putting in the new firepole on the treehouse.  I have cut the railing and inserted the top end of the mechanism high up.  Unfortunately, the firepole is so high up that the bottom is about six feet from the ground.  I have to go buy some additional pipe to add to the firepole so that it reaches the ground.  I am going to pour a substantial concrete base so that the pole also serves as yet one more support for the treehouse deck up above. A picture will appear here when I get the additional pipe in place.

Tuesday, June 15, 2021

New Ladder and Fire Pole for the Tree House


I found this combination ladder and firepole that someone was decommissioning from their treehouse in the local free recycling listing.  The picture above is at the treehouse that was being decommissioned.  My treehouse has developed somewhat of a tilt this year, so I decided to fix the tilt and make sure that it doesn't happen again.  The current treehouse has three supports keeping it up in the tree.  The first support is the trunk of the tree itself.  The other two points of support are two large branches.  Each of those branches is further supported by beams going all the way to the ground.  I took the opportunity to add the new ladder and firepole to the weakest of the two beams, figuring that the steel ladder was stronger, especially with the concrete pad that I am installing at its base.  

I will take a picture of the newly installed ladder and firepole as I complete the job.  I have already jacked up the two existing beams about three inches to level off the treehouse.


Sunday, July 14, 2019

Finally, I added the bucket to haul stuff up to the crow's nest

Well, it has been quite some time since the rest of the house has been completed. I finally added a bucket and rope to haul up stuff to the treehouse.

Real simple.  A plastic shopping basket, a nylon rope, a pulley, a carabiner, an eyehook, and a long pole screwed onto the railing of the crow's nest.  Then I added a cleat so that I can hold the basket in place and take the contents of the basket out.


Saturday, December 22, 2018

A Model Treehouse


If building the treehouse in the first place, wasn't enough, I have now completed a replica model of the treehouse.  I have also decorated the interior exactly as the real one is decorated, right down to the pictures on the wall, the furniture, etc.


I have concluded that it is much easier to build the model than the real thing.
I may add the stairway on the model, but, if I do, I will have to add something to hold the whole thing up into the air. Perhaps a little tree!

Sunday, December 9, 2018

Getting the Treehouse Ready for Christmas


It just didn't seem right to not decorate the treehouse for Christmas, so we have added LED lights around the railing and put up a Santa Banner.  This is definitely in keeping with the season.  Merry Christmas!

Wednesday, August 15, 2018

Dream of a Treehouse

Dream of a Treehouse


One of my earliest recollections from childhood is that I wanted
to build a treehouse  — It was right up there with digging a hole
to China, driving a car, and, of course, flying an airplane.


I did try to dig that hole.  I must have been about seven or eight
years old. And I think my brother and I dug for hours over
multiple days and must have gone down about four feet in our
backyard before we became disillusioned with how much digging
was required, how hard that digging had become, and how much
dirt we had to remove from the hole to actually get there (that is
to China, of course).  The hole sat abandoned for years and every
time I looked at it, especially as I became a teenager, I was
reminded of the foolishness of ever thinking that we could ever
dig all the way to China.


Driving a car was certainly a more realistic objective and came
to fruition sometime when I was 15 years old.  I remember having
had a calendar on the wall in my bedroom right near my bed with
each date showing the number of days remaining before I could
get my driving permit.  I must have started counting six months
before the actual day arrived -- sort of like a prisoner waiting for
his sentence to be over so that he could walk out of the prison gate
a free man.  The day for my driving permit finally arrived — at first
I only drove while accompanied by my mother, but that first day
after passing my test and getting my real license was a wondrous
day of freedom that I shall never forget.


Now, flying a plane was not something that I really expected to
have happen anytime soon.  But fortune was with me when as a
college sophomore at age 19 participating in mandatory Air Force
ROTC my opportunity to actually pilot a plane arrived.  One day
we were treated to a trip in a vintage WWII era military plane. It
was a C-47. This was a twin-engine workhorse for troop and
equipment transport. It is the plane that was converted into the
DC-3 after the war and used for short haul passenger transport
on rural airlines.  It held about 29 passengers.


The instructors promised that each of us would have an opportunity
to actually fly the plane that day. When it was my turn I went
forward and got strapped into the co-pilot seat. I was shown
what the various controls did -- throttles here, stick there, elevators
down there, rudder, and the landing gear, etc. Then, real simple,
I was told to take over the controls.   As it happens we were right
over downtown Chicago and I banked left and right and pulled the
nose of the plane up and pushed it down like I was doing a bombing
run on Sears Tower. It was one of the most exciting moments of my
life up to that point.


My early childhood dreams of building a treehouse had faded more
and more as I grew older. Oh, yes, when my children were young I
built a fort out in the backyard for them.  It was four tree trunks with
a platform about eight feet in the air. I wouldn’t quite call it a
treehouse.


As the kids got older I got involved in grown-up things again.  And
the dreams of a real treehouse faded even more.


And then, one day, I was already a retired old man and my grand-
son came to visit. He was about five years old.  We played around
in the backyard and talked about kid things. And he, like me as a
young boy, started talking about a treehouse.  We looked around
the yard and carefully sized up each tree as the potential site for a
treehouse. But talking about building a treehouse and really building
a treehouse are two entirely different things.   And every time he
would come over he would bring up the subject again, and I would
hem and haw about the fact that it wasn’t a good time to start
building it.


Each time he would leave with hopes that someday he would
get his treehouse.  Finally, my wife had to tell me very sternly
that I had made my grandson a promise and that I must keep
my word to him or I might just earn the reputation in his mind
that his grandfather just doesn’t keep his word.


Well, that was that. I couldn’t let him see me that way.  So, on
one cool morning in early December I started making my plans
to build the treehouse.  I figured it would take a few weeks and
that it would be a surprise Christmas present for him.  I had
previously decided which tree was going to support the structure.
I climbed the tree on a ladder and meticulously figured out where
all the beams were going to be placed.  I had a very ambitious
treehouse plan indeed.


After reading all I could find about actually building a treehouse,
the first part of the project was to construct a deck.   My deck
was going to be 30 feet above the ground. Sure, why not?
After completing the deck I constructed an elaborate series of
staircases and passageways that allowed me to get from the
ground up to the deck.  Then the railings for the deck, the
framing for the house, the roof and windows, the siding and
door, and interior walls, ceiling and floor. I even put in electric,
telephone, wi-fi, and a chimney. It was eight months from the
first trip up the ladder until it was completed.  My grandson was
now nine years old.


The treehouse has two rooms - the main room and a sleeping
alcove.  In addition to the deck, there is a crow’s nest up and
behind the house, level with the roof for observing the world
way down below. On one side we have a view of the mountains,
on the other the Bay.  It is far enough away from any other
structures that it leaves me breathless to be up there. This is in
every sense a treehouse worthy of that name.
My “Flying Cloud”.


My grandson and I have just spent the weekend in the treehouse.
Two nights sleeping in the trees. It has been a wonderful bonding
moment for us and we will never forget it.


In a way, building that treehouse has brought a certain awe back
into my life  — what it is to dream of something and then to see
that dream become a reality -- and what it is to see the sparkle
in a young boy’s eyes of a fantasy come to life right before him.


I have been transplanted from the East Coast to the West Coast, from Technology Builder to Dream Builder, and from childhood to second childhood.


Sunday, August 5, 2018

Our First Sleep-in


The night of our inaugural sleep-in has arrived.  Everything is ready for the night.  My grandson and I went up to the tree house and prepared the bed for the night.  We had a great time except we had to open a window to let the inside cool down a little and we let in some mosquitoes, so sleeping became difficult the first night.  On the second day we built some screens so that we could open the windows and not let in the mosquitoes.  Much better.  From the bed we could look out the various windows.  When the moon rose we could clearly see it without getting out of bed.  

In the morning the sun came beaming in the window on my side.  Below are the two campers when we were ready to get up.


Friday, July 20, 2018

Post Treehouse Completion Work

There have been a few loose ends that have been now tended to:

I buried the electric cable from the junction box over to the base of the tree.
I have installed a weather strip under the door.
I have tightened up the rungs of the stairway ladders.
I still have to stain the door and mount a few more lights outside.

I am now giving more thought to the suspension bridge that I want to build from a nearby tree.  The bridge would be about 30 feet in length.  I would have to string cables from the pine tree and the other tree and also build a stairway to a platform in the other tree.

I also have to install a basket and pulley arrangement to get supplies up to the treehouse from the ground.


No pictures this week.

We have been enjoying the late afternoons up on the observation deck.  Our grandson will be visiting in about a week, so I anticipate the first sleep over with him while he is here.  Maybe he will have some ideas on improvements to make on the treehouse.

Saturday, June 30, 2018

That Curious Thing in my Post of Dec. 23, 2017


I have received a number of inquiries as to what that gadget is in the lower left hand corner of an image I posted on this blog on December 23, 2017.  The image above is taken from that post.

Below I have a better image of the contraption I build over the last few decades.


In this image you can clearly see the pine tree that the treehouse sits under.  The treehouse is about where the bell is located.  This is a cupola that I built.  It has a very interesting history.  

Many years ago I saw a weather vane on top of an old New England church in Wilton. CT.  I went back to the church and sketched the weather vane in great detail.  That winter I made a much larger template and copied it onto a sheet of copper.  I very carefully cut out the intricate pattern using a combination of drill bits, a coping saw, and files.  When that part was completed I soldered on a vertical copper pipe so that I could mount the weather vane on a shaft so that it could rotate in the wind.  Finally, I learned how to put a verdigris patina on the metal and that part was finished.  I then located a base with the four wind directions already crafted and mounted the weathervane on the shaft.  I had built an octagonal roof over a well at our home in CT and mounted the weathervane above that.

Years later I acquired the cupola that was from an 1850s CT barn.  There was no copper visible on the cupola, but I knew it was beneath the tar that had been painted onto it for some unknown reason.  I carefully removed the tar and repatinaed the cupola with the same verdigris technique I used on the weathervane.  The cupola sat for many years, since I did not have a good place to put it. I did buy some small recycled double hung 6 over 6 windows that I was going to use for the walls of the cupola below the copper part.  

We acquired the bell from my wife's father who had the bell in his yard for many years when they moved and didn't want it anymore.

Then, about five years ago I had built a pergola on top of a deck on my house and then came to the realization that I could install the whole thing up there.  The image shows the completed project.  
My wife convinced me not to use the windows since she said they would be impossible to clean and would detract from the beauty of the cupola after a while.

Interestingly, it is those very windows, 20 years after I bought them, that are the windows I used in the treehouse.  

Talk about recycling.

I hope this answers the question.

Sunday, June 10, 2018

Getting the Interior Decorated


With the carpentry done, our attention has shifted to decorating the interior space.  The foam and upholstery material arrived and we have turned them into a pair of cushions.  During normal use, with one on top of the other, they will serve as a couch,  then they can then be put side by side to made into a bed that is almost queen size.  I still need to find some small stools, chairs, or benches to go inside.

Wednesday, May 30, 2018

For all Intents, The Tree House is now Complete


Well, the day has finally come.  The final touches on the Treehouse have been completed.  The door has been fitted, the saddle has been placed in the frame, the weatherstripping and stops have been installed, the latch and door handle have been fashioned and installed.  We have tightened the cables and made final adjustments to stabilize the deck.
We have also cleaned the glass windows and frames and vacuumed the interior and exterior of the building.
We tried to install the rope bed, but it was a fraction too large to fit in the alcove and fit behind the tree stump coming through the floor.  As an alternative we have ordered foam that can be slid in there.  We have put pictures on the walls, brought in chairs and a table, and installed a rug.
Last night was a full moon, so we decided to go up to the crow's nest with two of the chairs with our coffees and enjoy the beautiful evening.  The temperature was delightful, the sky was quite clear.  

A job well done!

Tuesday, May 22, 2018

Finishing up the Finishing Touches

I have just completed the following items:

1.  Finished installing the plywood sub flooring inside the tree house.
2.  Installed the plank hardwood flooring.
3.  Installed the trim baseboards around the perimeter of the flooring.
4.  Installed the stop molding and weatherstripping for the door.
5.  Installed a few more pieces of trim molding on the walls where the tree limbs protrude through the walls. Ditto on a few of the corners.

I have built the saddle for the door, but I have not installed it. I must first cut off the bottom of the door to make enough room for it. I have also not completed the latch mechanism for the door or stained the door either.

I brought the rope trundle bed up to the tree house to see how it would fit.  Unfortunately, it is about 2" too long for it to fit in the alcove between the main tree and the end wall.  I will construct a smaller platform and put in a piece of foam for a mattress.  That is areal shame. I have been looking for years to find a place for this bed from the early 1800s.

We have to clean up all the dust throughout the tree house and in the deck area and complete the touch up painting.  Also, I have to tighten up the rungs on the various ladders.

Pictures to follow.  It is difficult to take pictures inside the tree house.

Saturday, May 19, 2018

Finishing Touches


Well, we had to take a break for about a week.  It turns out that wood of the type that I have been using carries a lot of pathogens and can be somewhat dangerous if you don't handle it properly. In particular, if you are not careful with the sawdust you can ingest those pathogens by breathing them in and create a lot of problems for yourself.  I was cutting some fairly wet wood and inhaled a lot of the pathogen infested dust and I came down with a fairly nasty cold.  My wife got some sawdust in her eye and came down with conjunctivitis at about the same time.  We are both back on our feet and progress on finishing the treehouse now continues.

I spent time making the door for the treehouse. I have used cedar. I have installed it into the doorway, but have not stained it yet.  I have also put down a layer of tar paper on the floor in the treehouse to prevent moisture from entering from below the floor I am going to install.  The floor I have chosen is a vinyl snap together floor plank system which is waterproof.  I am a bit concerned about how much the vinyl flooring weighs.  Before I actually install the vinyl I have installed a very thin layer of plywood to make sure the subsurface is level.  I expect to put down the vinyl tomorrow.  After the vinyl the only remaining item will be the baseboards around the flooring.  I still have the staining and the latch of the door and the final electrical fixture work to complete.  We are very close to completion of phase one of the project.

Monday, May 7, 2018

Treehouse Interior

Above is the view of the main room of the treehouse taken from the alcove below the crow's nest.

The above view shows the ceiling construction and the windows and door area.

This is the other two windows in the main room.  The thing in the middle of the picture is a branch that comes up through the floor and goes out the wall.

This is a picture of the alcove area where the bed will be placed. Branches on both sides.

This is an image showing the upper portion of the alcove and the window looking onto the crow's nest. 
This is an image from the crow's nest looking into the main room.  There is some glare on the glass.

We have now completed the interior of the treehouse with the exception of the door and the flooring.  The pictures above tell it all.

Monday, April 30, 2018

Exterior of Treehouse is Complete


We have finally gotten to the point where the exterior of the treehouse is complete. The remaining portion of the handrail on the crow's nest was added, the scaffolding has been removed, electrical wiring has been put in the walls, and the final window has been installed.

We have started on the interior.  The ceiling has been sheetrocked, spackled, sanded primed and painted.  The cedar panelling has been almost completely installed.

The only remaining items on the checklist are:
Finish panelling
Install flooring
Make and install door
Install light fixtures.

Monday, April 23, 2018

Further Progress


It is hard to show great changes to the treehouse since the pictures are starting to look like a finished project.  We almost finished painting the exterior of the building after building another scaffold so that we can work on the side that has no deck associated with it -- ran out of paint right near the end yesterday. We will probably finish that today.  The exterior trim is all cut and painted and ready to install as soon as the painting is done.  We installed the final hinged window -- one more fixed window to go.  

We have installed low voltage wiring inside the walls and sheetrocked the rafters inside the house. I have installed 4" logs as collar ties. They are really good looking in there.  We have also trimmed out the interior with some furring strips so that the white cedar wall boards can be installed.  We will sand the sheetrock and paint it before we install the cedar boards.  There would be no way to remove any paint splatter from the cedar boards should we have any.

The crow's nest roof is totally complete. I have even tarred the cap of the chimney and repositioned the stairway going up there and fully screwed it in place.

The to do list now has the following items left to complete:
    Finish exterior painting and nail on trim.
    Install one fixed window in the sleeping alcove.
    Make and install the door (I have finished the design at this point)
    Install the cedar walls.
    Install the hardwood flooring.
    Buy and install window and door latches.
    Install lighting fixtures.

Tuesday, April 10, 2018

Chimney and Trim


This week we worked on more of the finishing touches on the outside of the building.  We have installed six of the eight windows, the trim on 3 of them, finished the rolled roofing on the crow's nest, and installed the faux chimney.

The chimney proved to be the most difficult of the tasks.  I had originally intended to put a pulley on the pine tree immediately above the treehouse and then haul the chimney which I had fabricated in the workshop up to the crow's nest and then gently move it over to the slot in the roof where it was supposed to go.  Well, that turned into a bad theory.  The chimney weighed over 300 pounds and as much as we pulled on the ropes there was just too much weight to do it that way.  We finally cradled the chimney in some ropes and then slid it up each of the stairways with a lot of brute force.  It was exhausting.  From the crow's nest we built a platform on top of the railing and moved the chimney from the deck of the crow's nest to the platform. It was at that point that we connected the pulley system to the pine tree above and gently nudged it over into its place on the roof.  From inside we screwed it to the roof so that it would not budge.  It looks great and changes the character of the entire building.


We have about one more day of work to finish up the outside of the building except for the door.  Then, we will start finishing the inside.  We have decided to put sheetrock on the rafters, white cedar boards on the walls and a hardwood flooring.

Tuesday, April 3, 2018

Further Progress on the Outside of the Treehouse


We are getting really close to finishing the outside of the treehouse.
The new beige paint color is much better for the siding.  I have now installed most of the windows and put the rolled roofing on the crow's nest.  The trim around the windows is moving along.  A few more days of work and the entire outside will be done with the exception of the door itself.